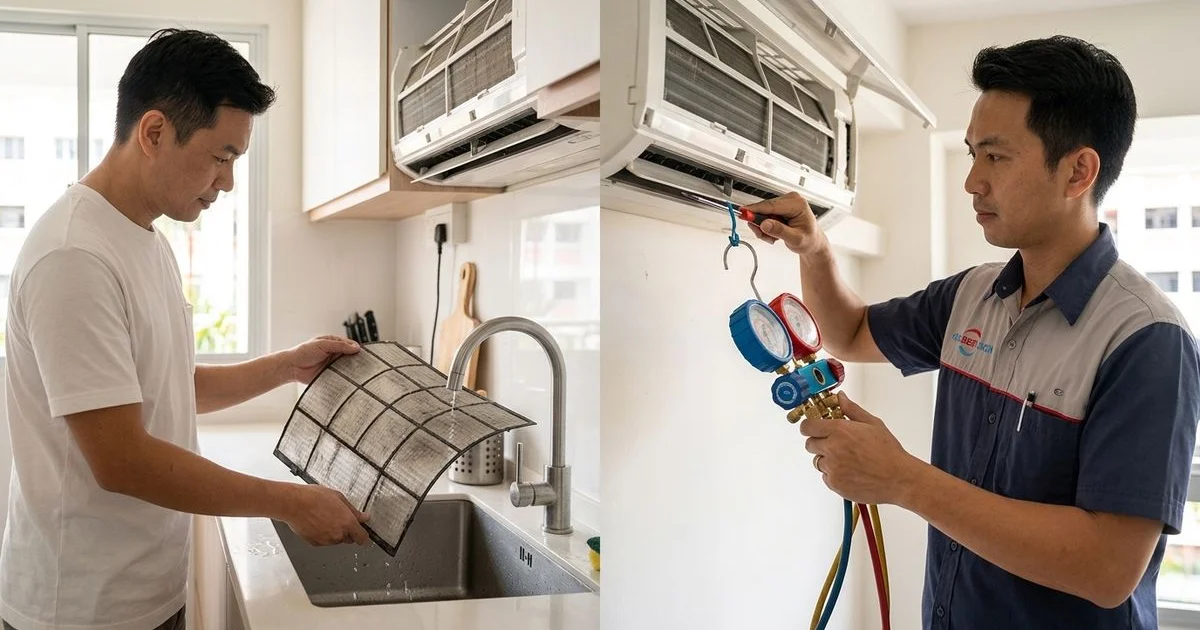
We know that Singapore’s 85% humidity combined with daily 8 to 12 hours of usage takes a massive toll on cooling systems. This intense demand accelerates mould and bacteria growth much faster than in temperate climates. A chemical overhaul is the most thorough deep cleaning service your aircon can receive.
Unlike a standard chemical wash where cleaning happens with the unit still on the wall, a chemical overhaul involves completely removing the indoor unit. Every single internal component is then individually cleaned, inspected, and restored to factory condition.
Our team frequently recommends this complete teardown for neglected units facing persistent water leaks or airflow issues.
Let us break down exactly what happens during a professional chemical overhaul from start to finish.
Before the Overhaul: Initial Assessment
We will never jump straight into an overhaul without first checking if it is exactly what your unit needs. The initial assessment provides a clear roadmap for the service.
The pre-overhaul inspection includes:
- Visual inspection: Checking the indoor unit for visible mould, thick grime buildup, and distinct water stains on the wall.
- Performance test: Measuring the temperature of the air output versus your set temperature using a digital thermometer.
- Auditory check: Listening for abnormal rattling or grinding sounds that point to mechanical issues beyond simple dirt.
- Feasibility check: Verifying the unit’s age and specific brand model (like Daikin or Mitsubishi) to ensure replacement parts are still locally available.
Our technicians will inform you immediately if the assessment reveals a failing Printed Circuit Board (PCB) or a dying compressor. A chemical overhaul cannot fix burnt electrical parts or dead motors. Those specific failures require dedicated component replacements.
Step 1: Power Off and Safety Preparation
Safety protocols are the strict first step before any dismantling begins. Residential HDB flats run on a 230V power supply, making proper electrical isolation critical.
The preparation phase includes:
- Switching off the aircon at both the remote control and the main wall isolator.
- Turning off the dedicated circuit breaker in your distribution board.
- Laying heavy-duty protective sheets on the floor and over nearby furniture.
- Preparing the alkaline-based chemical solution and specialized hand tools.
We usually complete this initial safety and setup phase in about 5 to 10 minutes.
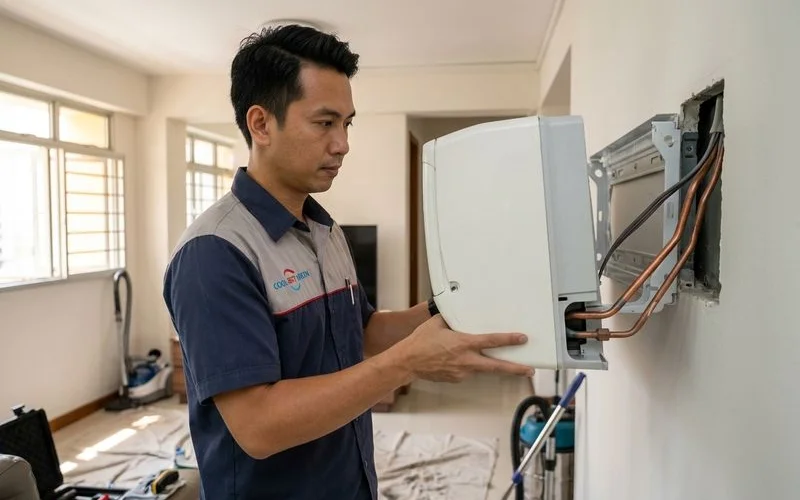
Step 2: Removing the Indoor Unit from the Wall
The complete removal of the indoor unit is exactly what distinguishes an overhaul from a basic chemical wash. The technician must carefully disconnect the fan coil unit from its wall mount.
The disconnection process covers:
- Electrical lines: Detaching the power cable and the signal wire connecting the indoor and outdoor units.
- Copper piping: Sealing off the refrigerant lines carefully to prevent any R32 or R410A gas from escaping into the room.
- Drainage system: Disconnecting the main condensate drain pipe.
- Mounting bracket: Lifting the entire plastic housing and coil assembly off the metal wall bracket.
Our team then places the dismantled unit on the protective sheets or moves it to a safe, wet-washing area like a bathroom.
Improper removal can easily snap a copper pipe or bend the delicate evaporator coil fins. Repairing a snapped copper pipe and topping up lost gas can cost between $80 and $150 in Singapore. This financial risk is a key reason why you must only let trained professionals handle the dismantling.
Step 3: Complete Disassembly
The technician systematically takes the removed unit apart down to its base components. Each part requires a different cleaning approach.
The major separated components include:
- Front panel and casing: The outer plastic housing.
- Air filters: The primary mesh screens that catch airborne dust.
- Evaporator coil: The dense aluminium fin heat exchanger where the actual room cooling takes place.
- Blower wheel (fan): The long cylindrical fan blade that forces chilled air out of the vents.
- Fan motor: The electric drive mechanism for the blower wheel.
- Drainage tray: The plastic trough that catches normal water condensation.
- Electrical board (PCB): Removed safely and kept completely dry.
- Thermistor sensor: The highly sensitive temperature monitor.
We carefully label or group the screws and specific brand components so the reassembly process remains perfectly accurate.
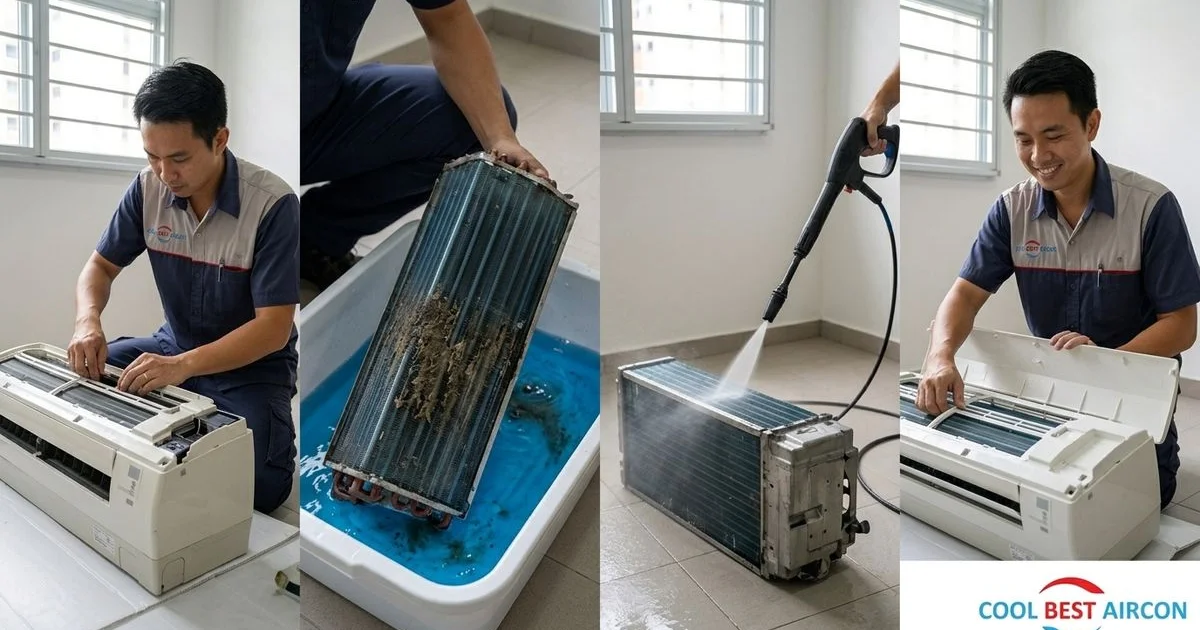
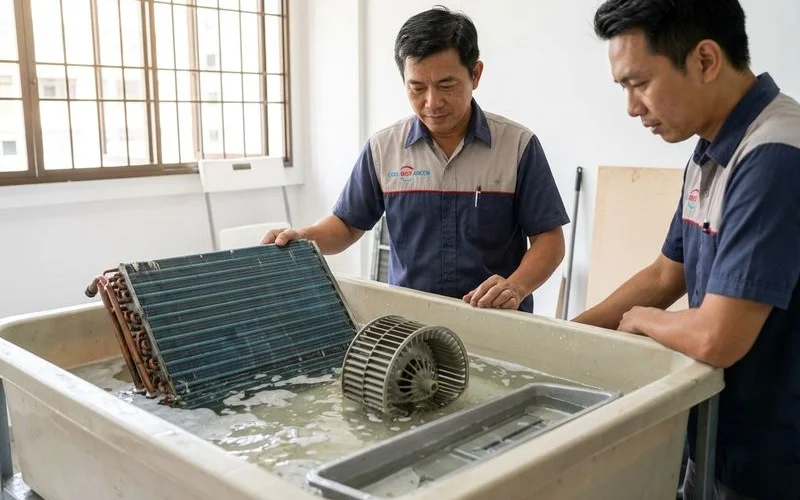
Step 4: Chemical Soaking
The chemical soak is the defining core action of the overhaul. Every non-electrical part goes into a deep bath of professional cleaning solution.
Our specialists use premium, alkaline-based formulas rather than harsh acidic cleaners. These alkaline solutions are specifically formulated to:
- Dissolve grease and oil: Breaking down sticky residue from cooking fumes and haze pollutants.
- Eradicate biological growth: Killing the specific mould and bacteria spores that thrive in wet, dark environments.
- Lift organic buildup: Removing packed dust deposits and dead skin cells from the tightest crevices.
- Clear mineral scale: Dissolving hard water deposits clinging to the drainage tray.
This targeted soaking process requires 20 to 30 minutes of undisturbed contact time. Highly contaminated older units often require two full rounds of soaking to break down years of calcified dirt.
Step 5: Manual Scrubbing and Detailing
The technician hand-cleans every soaked component to physically brush away the loosened deposits. This manual detailing requires special tools.
The detailing phase involves:
- Evaporator coil: Using a specialized fin comb and soft brush to clear the tight spaces between the aluminium fins.
- Blower wheel: Brushing each individual curved blade on the cylindrical fan.
- Drainage tray: Scrubbing the trough and clearing the tiny outlet hole of any jelly-like bacterial blockages.
- Housing and panels: Wiping down the interior and exterior plastics to remove lingering dust stains.
Our thorough brushing of the blower wheel directly eliminates the primary source of bad smells and restores optimal wind speed. This 360-degree access is exactly why an overhaul achieves results a standard wall wash simply cannot match.
Step 6: Thorough Rinsing
A high-pressure water rinse flushes every treated component multiple times. The goal is to leave absolutely bare, clean surfaces behind.
The rinsing removes:
- All remaining traces of the alkaline chemical solution.
- The dissolved biological contaminants and heavy grease.
- Stubborn loosened particles trapped deep inside the coil matrix.
We strictly control the water pressure using dedicated jet washers to prevent bending the fragile aluminium coil fins. Leaving any chemical residue behind can cause long-term metal corrosion. A trained professional understands exactly how much water volume is required for a safe, neutral rinse.
Step 7: Inspection of Components
The technician inspects every freshly cleaned part under bright light to catch early signs of mechanical failure. Dirt often hides hairline cracks and rust.
The detailed inspection covers:
- Evaporator coil: Searching for bent fins, surface corrosion, or tiny oil stains that indicate a hidden refrigerant leak.
- Blower wheel: Checking the plastic cylinder for micro-cracks and testing the bearing balance.
- Fan motor: Spinning the shaft manually to confirm smooth operation without grinding.
- Electrical connections: Looking closely for loose wire terminals or burnt copper connectors on the PCB.
- Drainage system: Checking the plastic tray for warping caused by age and temperature fluctuations.
Our early detection of a cracked drainage tray prevents sudden water leaks from ruining your expensive flooring. Catching a $50 part failure during the overhaul saves you from paying a separate, expensive emergency call-out fee a month later.
Step 8: Reassembly
The technician systematically puts the aircon back together once every part is completely dry and cleared of defects. The sequence happens in reverse.
The reassembly steps are:
- Reinstalling the drainage tray and confirming it sits at the correct tilt angle.
- Mounting the heavy evaporator coil securely into the chassis.
- Sliding the blower wheel and fan motor into place while testing the spin freely.
- Reconnecting the sensitive PCB board and tightening all electrical terminals.
- Seating the thermistor sensor back into its precise factory position.
- Snapping the front panel and plastic housing tightly together.
- Sliding the freshly sanitized air filters into their tracks.
We double-check the torque on every single mounting screw to ensure no annoying plastic rattling occurs when the unit powers on.
Step 9: Remounting and Reconnection
The fully assembled unit goes back onto the metal wall bracket. The technician must secure the heavy unit firmly with zero vibration play.
The critical reconnections include:
- Copper piping: Fastening the flare nuts back onto the refrigerant lines.
- Electrical cables: Wiring the power and signal cables securely back into the terminal block.
- Drainage pipe: Slipping the main condensate line back onto the tray outlet.
Our technicians always apply an electronic leak detector or a soapy water test over the copper joints to guarantee the gas seal is completely tight.
Step 10: Refrigerant Check and Performance Testing
A comprehensive live performance test acts as the final quality control check. The unit is powered on and pushed to its maximum setting.
The testing protocol features:
- Gas pressure check: Attaching a manifold gauge to the outdoor condenser to verify the exact operating pressure.
- Temperature test: Comparing the cold air output against the room temperature.
- Airflow check: Verifying the wind strength is powerful and perfectly even across the entire horizontal louver.
- Drainage test: Pouring a small test volume of water into the tray to ensure gravity pulls it down the pipe instantly.
We always look for a healthy temperature drop of 8°C to 12°C between the room air and the output air. If the manifold gauge shows low refrigerant levels, a standard gas top-up will restore the system to peak chilling capacity.
How Long Does the Entire Process Take?
A standard HDB flat requiring multiple units cleaned will take up a significant portion of the day.
| Number of Units | Estimated Completion Time |
|---|---|
| 1 unit | 1.5 to 2 hours |
| 2 units | 2.5 to 3.5 hours |
| 3 units | 3.5 to 4.5 hours |
| 4 units | 4.5 to 6 hours |
Our timeline depends heavily on how badly the blower wheel and coils are impacted by dirt. Units located near busy kitchens or exposed to heavy cigarette smoke require extended soaking periods.
What to Expect After the Overhaul
The difference in performance is usually drastic and immediate.
- Instant, powerful cooling: The unblocked evaporator coil transfers heat efficiently again.
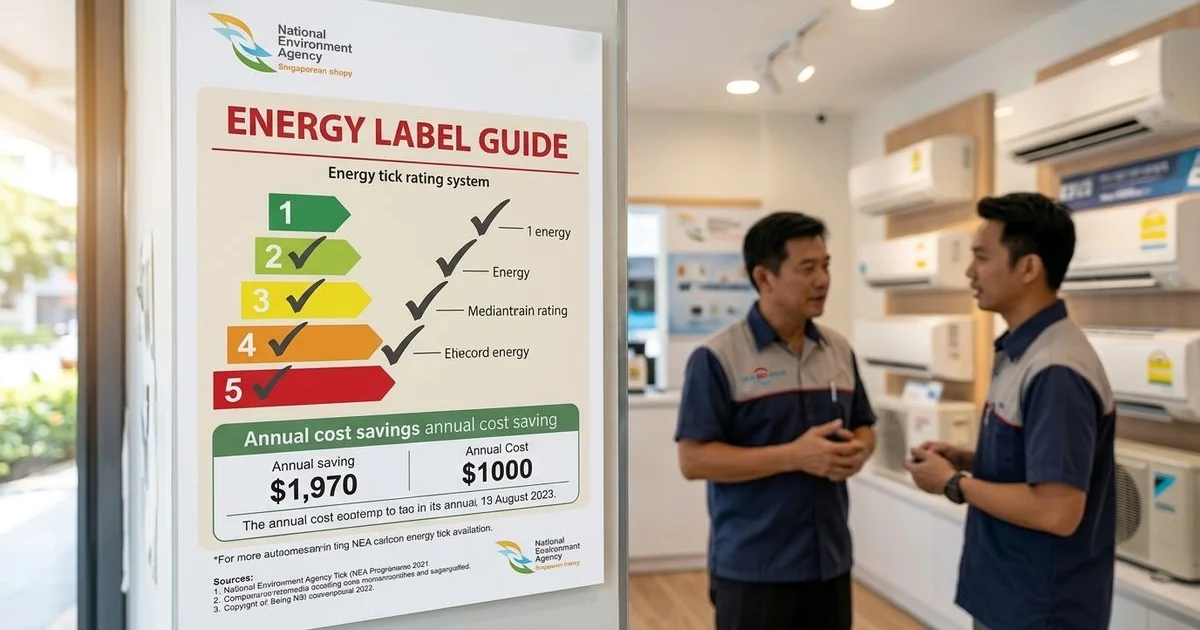
- Significant electricity savings: SP Group’s household electricity tariff for Q1 2026 sits at 29.11 cents per kWh (with GST). Lowering your consumption by 15% to 25% offers tangible monthly savings.
- Fresh, clean air: The chemical soak permanently destroys the source of damp, sour odours.
- Silent nights: Removing unbalanced dirt from the blower wheel stops annoying vibrations.
Our clients typically enjoy these peak performance benefits for 12 to 18 months. Booking a regular quarterly servicing is the best way to maintain that freshly cleaned efficiency.
How Often Do You Need a Chemical Overhaul?
A well-maintained aircon operating in a normal Singapore residential environment needs a chemical overhaul every 3 to 5 years. Routine annual chemical washes provide enough preventative deep cleaning during the years in between.
We strongly advise an immediate overhaul if you move into a resale flat where the previous owner clearly neglected the aircon maintenance. Restoring the baseline cleanliness makes all future standard servicing appointments much more effective.
Choosing the Right Service Provider
You need to know exactly what you are paying for when booking this complex service.
- Brand-specific experience: The technician must handle Daikin, Mitsubishi, Panasonic, or LG units regularly.
- Upfront pricing: The quote must include the dismantling labour, the chemical soak, and the reassembly without hidden top-ups.
- Service warranty: A confident company backs their dismantling work with a clear guarantee against leaks.
- Safe chemicals: The provider must explicitly state they use alkaline, non-corrosive solutions.
Coolbest Aircon Servicing handles every single technical step described in this guide. Our technicians apply years of hands-on experience using safe, professional-grade alkaline formulas to protect your equipment.
Ready to stop the water leaks and restore your aircon to its factory cooling power? Contact us at 9182 5233 or visit our chemical overhaul service page to secure your appointment today.
Mr Chong
Founder & Lead Technician
Mr Chong founded Coolbest Aircon in 2005 with over 18 years of hands-on aircon servicing experience in Singapore.